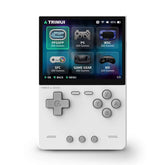
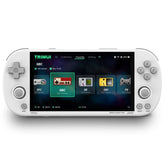
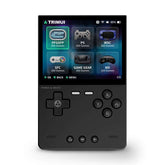
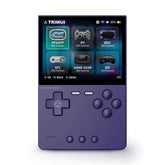
Trimui Smart Pro Roms Download
Recommended Accessories
- MicroSD Card: 128GB or 256GB (with the platforms this plays, you would be safe with either of these options)
- MicroSD Card Reader: UGREEN SD Card Reader
- Charger: UGREEN 65W Charger (use the USB-A port for charging)
Stock Setup Guide (without cloning)
This setup guide assumes you want to start from scratch, with a brand new branded SD card and you will be providing your own ROMs & BIOS files.
The first thing you need to is grab the latest firmware, and you can get that from here. The file that you want is the one that starts with trimui_tg5040.
Next, we need to setup the SD card, so you want to get those files from here and you want to choose the base_package option.
Extract both zip files using 7-Zip.
Now you want to format your brand new card as FAT32. We can use a program called Rufus to do so. Download the portable version.
Connect your SD card to your PC using a branded SD card reader (recommendations above), and open Rufus. Make sure that device is your SD card, should match the same size. Change Boot selection to Non bootable. Make sure that File system is FAT32 or Large FAT32. Click START.
When it’s done, you’ll have a blank FAT32 formatted SD card.
Copy the contents of the base_package zip you extracted to the root of the SD card – so the RetroArch, Emus etc. folders and then copy the .awimg file from the firmware zip to the root of the blank SD card we just formatted.
Eject and insert the SD card into your TrimUI Smart Pro.
Press and hold VOLUME MINUS + POWER at the same time and after some seconds, you’ll see a green loading bar. Release the POWER and then VOLUME MINUS buttons when you do.
The device will install the firmware, then automatically restart and you’ll be in the operating system.
Adding ROMs & BIOS
Connect your SD card to your PC.
Head inside the Roms folder, and you should see a bunch of folders for all of the systems that the device supports.
It should be pretty self explanatory at this point, but you want to move your ROMs for each system into the corresponding system folder.
For BIOS, head to the RetroArch folder, then .retroarch, and then system. Inside of this folder is where you would put your BIOS files.
Don’t forget, that when you add or remove ROM files, they may not always show up and you might need to refresh the ROM list. Head to the Game tab in the operating system, then push the Menu button on the device bottom left and select Refresh Roms.
Updating stock firmware and files
The first thing you need to is grab the latest firmware, and you can get that from here. The file that you want is the one that starts with trimui_tg5040.
Next, we need the SD card files which updates apps, RetroArch and more, so you want to get those files from here and you want to choose the base_package option.
Extract both zip files using 7-Zip.
Connect your SD card to your PC using a branded SD card reader (recommendation above). Copy the contents of the base_package zip you extracted to the root of the SD card – so the RetroArch, Emus etc. folders and then copy the .awimg file from the firmware zip to the root of your SD card.
Eject and insert the SD card into your TrimUI Smart Pro.
Press and hold VOLUME MINUS + POWER at the same time and after some seconds, you’ll see a green loading bar. Release the POWER and then VOLUME MINUS buttons when you do.
The device will install the firmware, then automatically restart and you’ll be in the operating system.
Turn off Shaders/Overlays
If you’re like me and you hate the shaders and overlays that come pre-installed for most systems, let me show you how to remove them. Jump into a game with them applied and push the menu button bottom left. Head to Advanced Menu. Now, scroll down to On-Screen Overlay and uncheck Display Overlay. Head back and scroll down to Shaders, uncheck Video Shaders. Head back and go to Overrides, and now Save Core Overrides.
Calibrate Joysticks
Head to Setting at the top, then System, then Calibrate Joystick. Press A, then select the left joystick first and follow the instructions, just rotate the stick. Go ahead and do the right stick after. Trust me, don’t skip this, you want to calibrate these.
Article source: https://www.joeysretrohandhelds.com/guides/trimui-smart-pro-setup-guide/


